NetSuite Vendor Statement
(Available for Free)

Bridging the Gap: Introducing Free Vendor Statements in NetSuite by SankalvaX
In the world of ERP systems, NetSuite stands out as a powerful tool for managing financials, operations, and more. However, even the most robust systems have their limitations. One such known gap in NetSuite is the absence of an out-of-the-box Vendor Statement feature.
While NetSuite provides a handy Customer Statement feature to print statements for a given date range, many companies struggle with the fact that there is no similar option for vendors. Vendor statements are crucial for reconciling accounts, resolving disputes, and ensuring seamless supplier communication. The only available solutions in the market often come at a high cost, adding to your ERP budget.
At SankalvaX, we've been listening to our clients' pain points, and we believe in empowering businesses with cost-effective solutions. That's why we're excited to offer a FREE Vendor Statement Tool for NetSuite users!
What's Included in Our Free Tool?
- Custom Vendor Statements - Generate vendor statements for a specific date range, just like you do for customers.
- Seamless Integration - The tool installs directly into your NetSuite instance without disrupting your existing setup.
- User-Friendly Design - Easy to use, no training required!
- Completely Free - No hidden costs, no subscriptions—just a simple solution to a common problem.
Why Are We Offering This for Free ?
At SankalvaX, we're passionate about solving real-world business challenges. Our goal is to make ERP systems like NetSuite more accessible, efficient, and tailored to your needs. By sharing this tool with the NetSuite community, we hope to add value to businesses of all sizes, fostering trust and collaboration along the way.
How to Install the Free Vendor Statement Tool?
- Download the Zip File -
- Login to NetSuite - Log in to your NetSuite account. Ensure that you have the Administrator role or that your role has permissions to create files, scripts, and deploy them.
- Upload the Zip File -
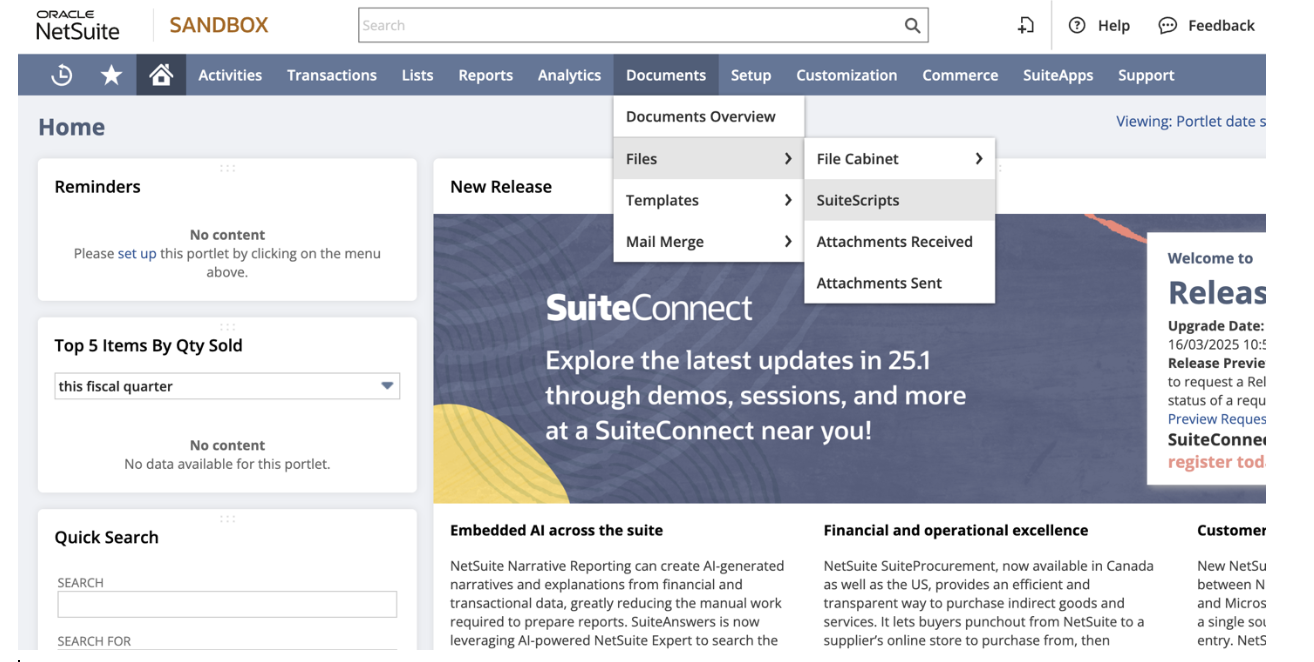
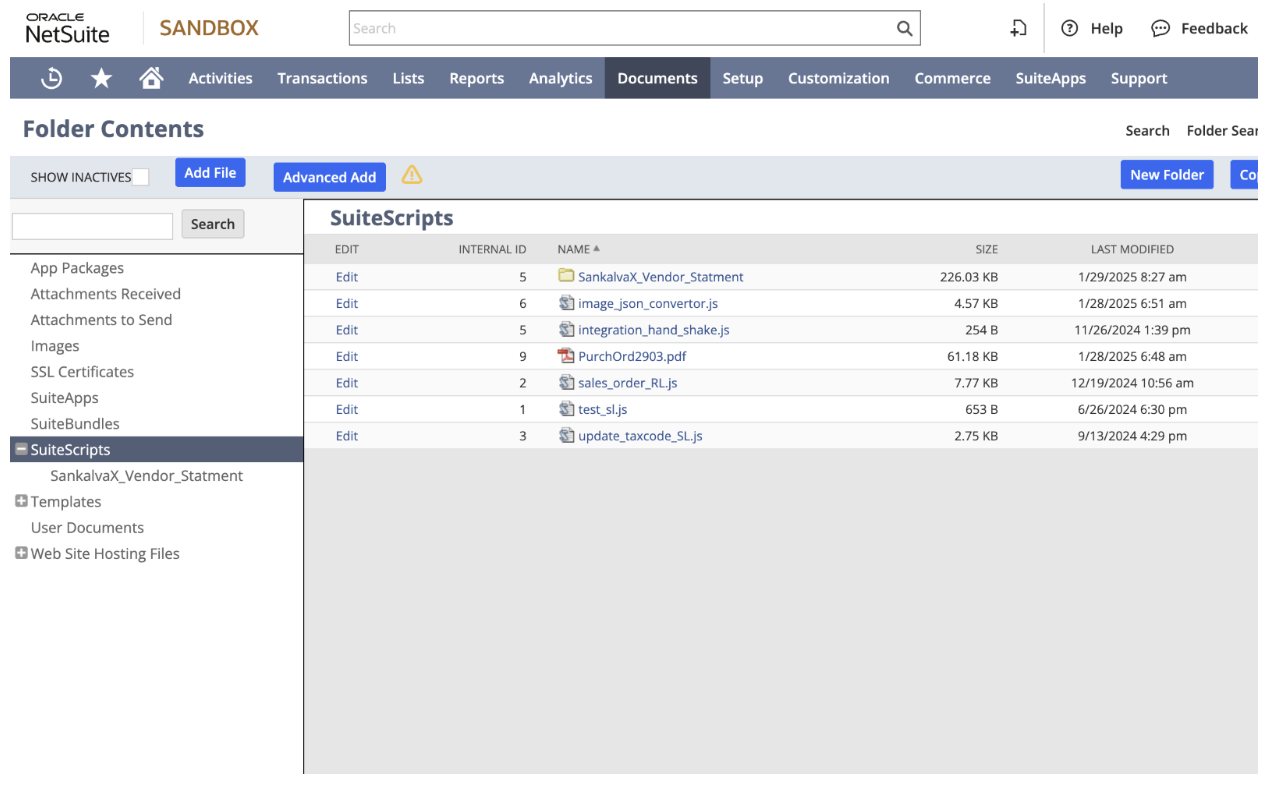
- In NetSuite, navigate to: Documents > Files > SuiteScripts.
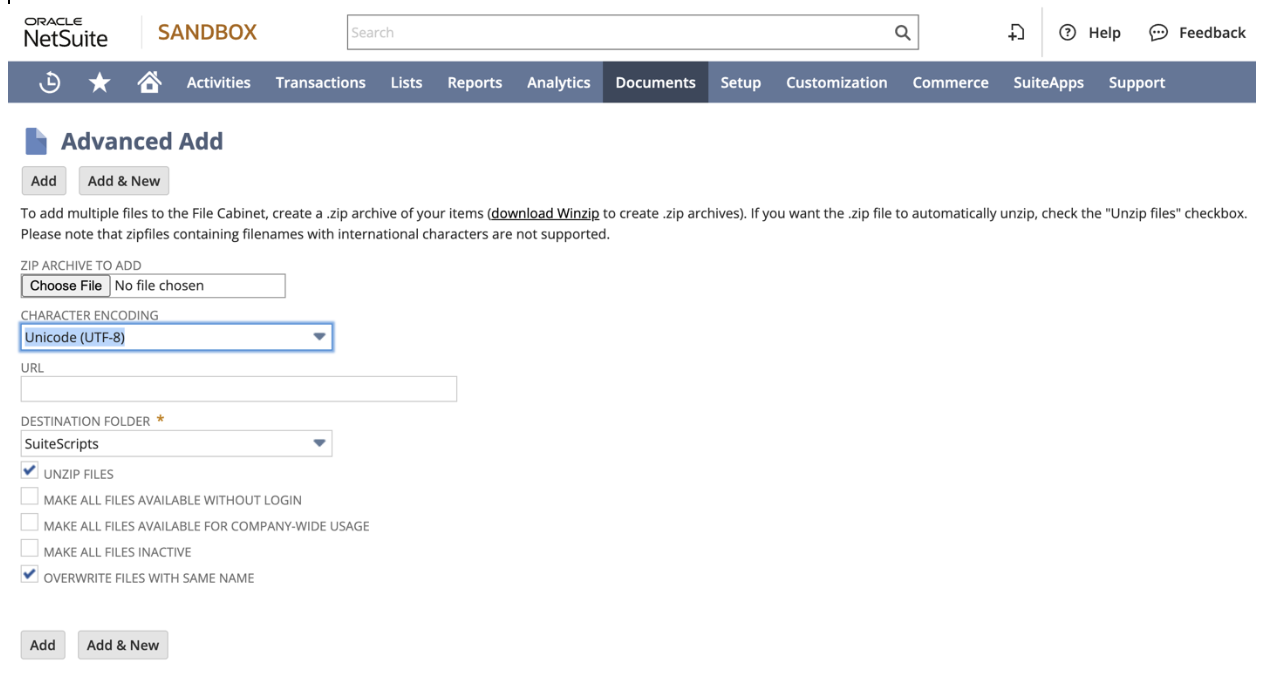
- Use the Advanced Add button to upload the zip file stored on your local computer.
- Verify Fields - Ensure that you have the same fields selected as shown in the image provided (you can include an image here for reference).and click Add Button.
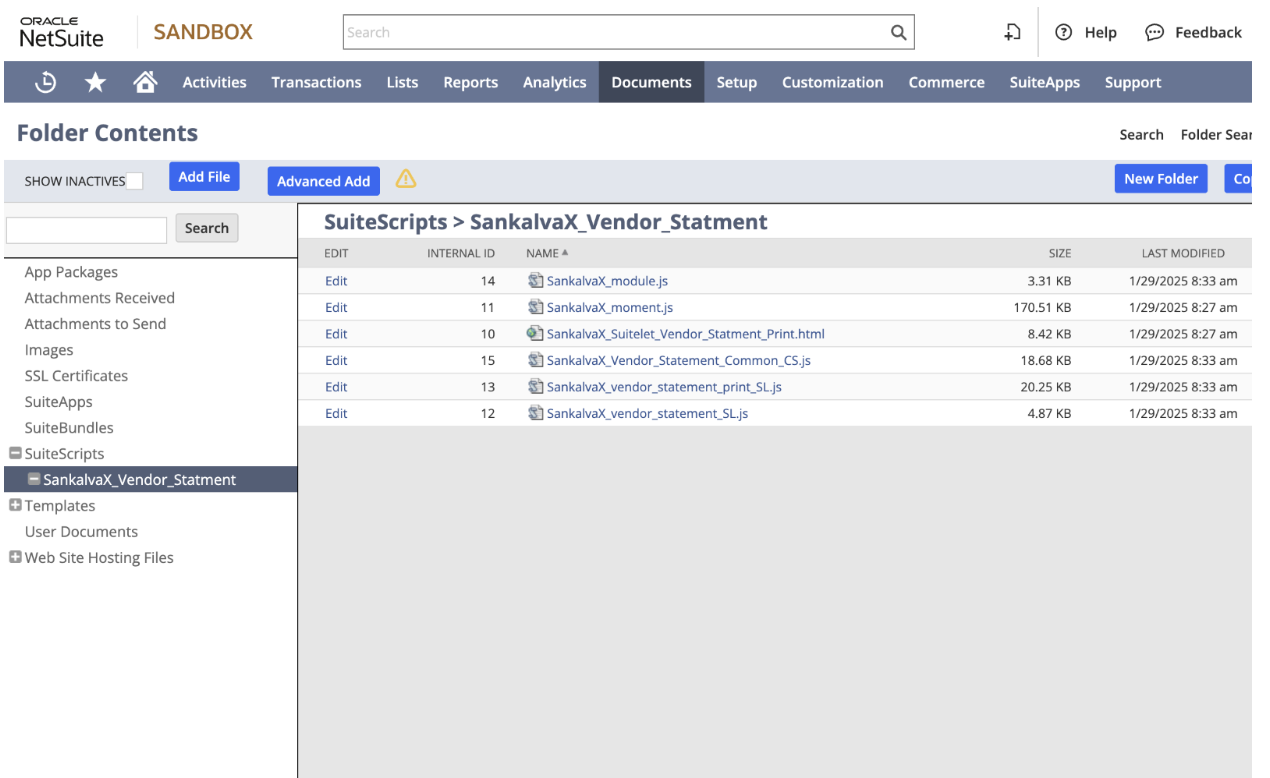
- Create Folder in NetSuite File Cabinet - The zip file will create a folder in the NetSuite File Cabinet, where you can pull the files for creating the script.
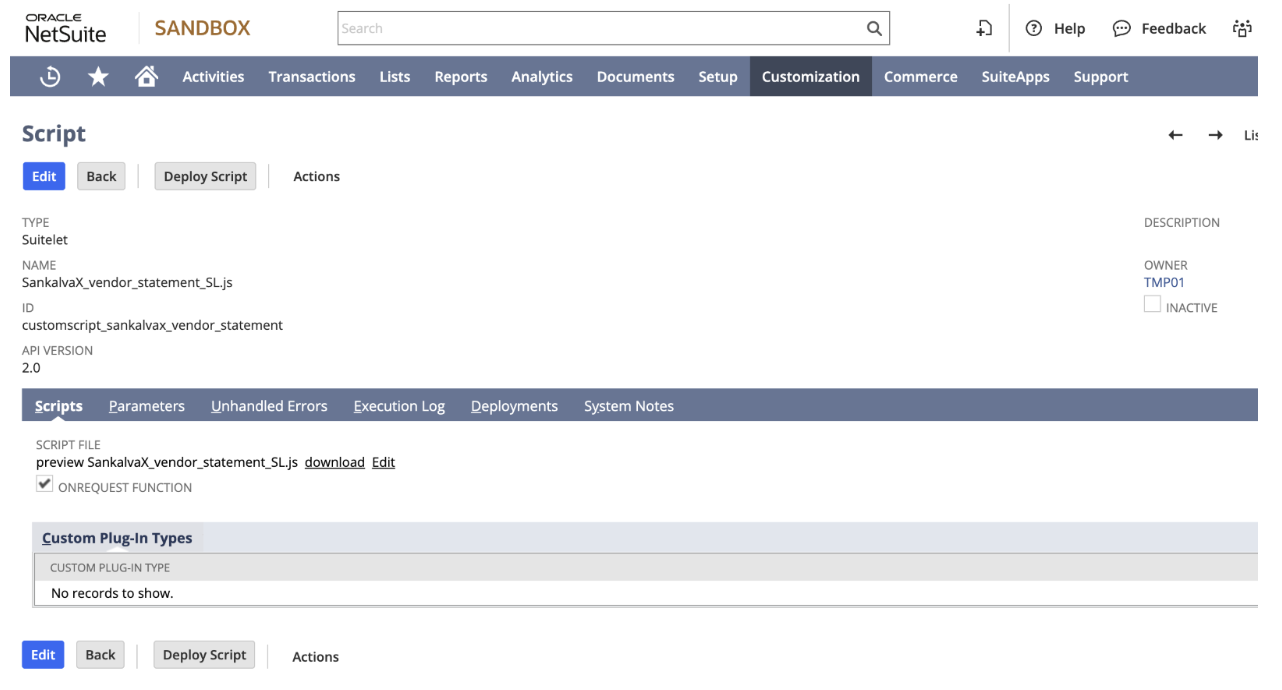
- Create Script Record -
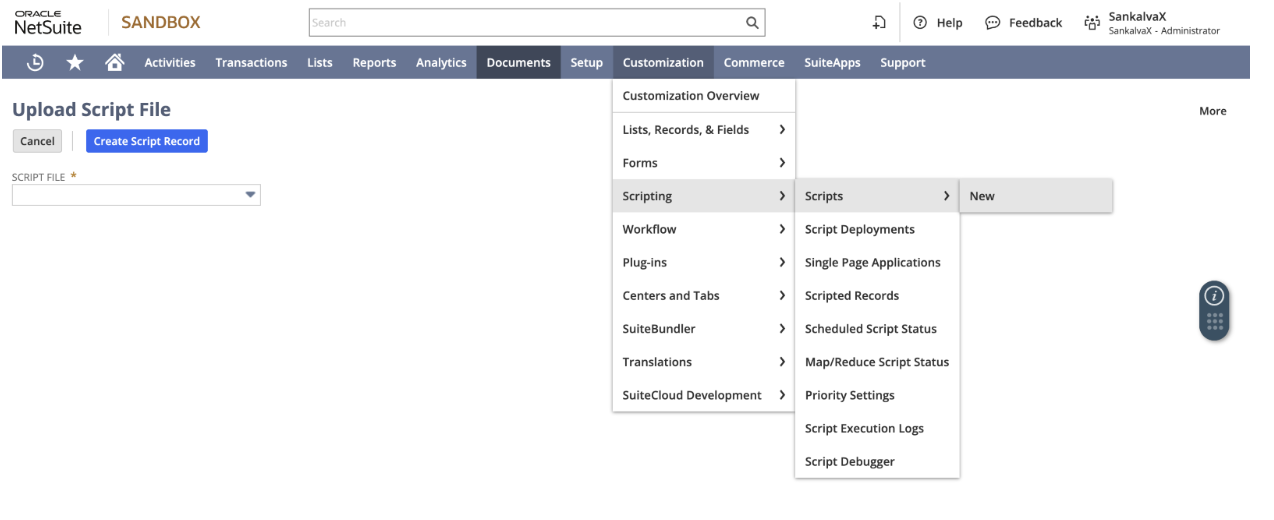
- Once the folder is uploaded, navigate to: Customization > Scripting > Scripts > New.
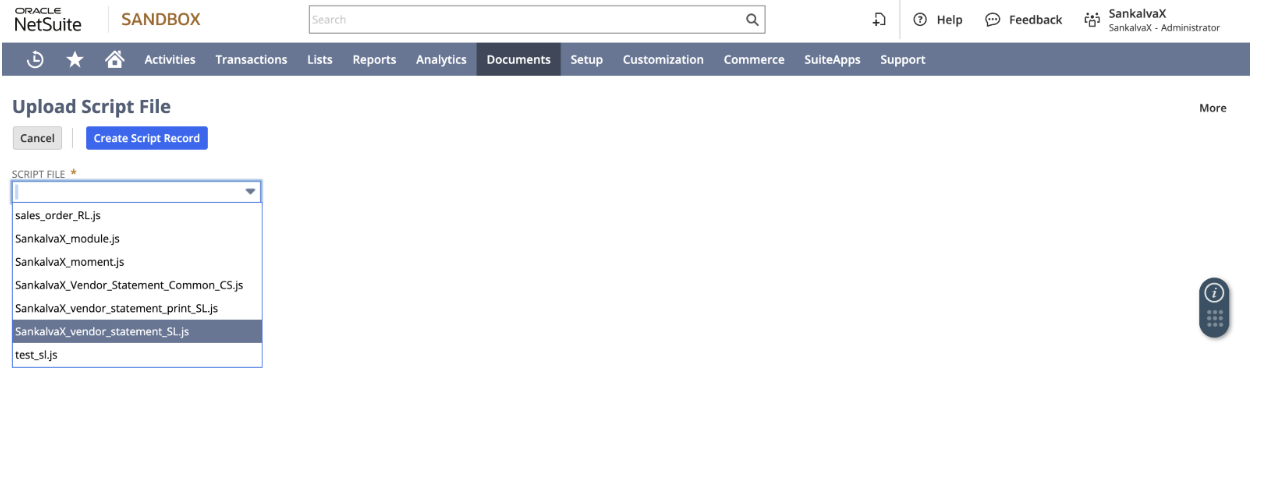
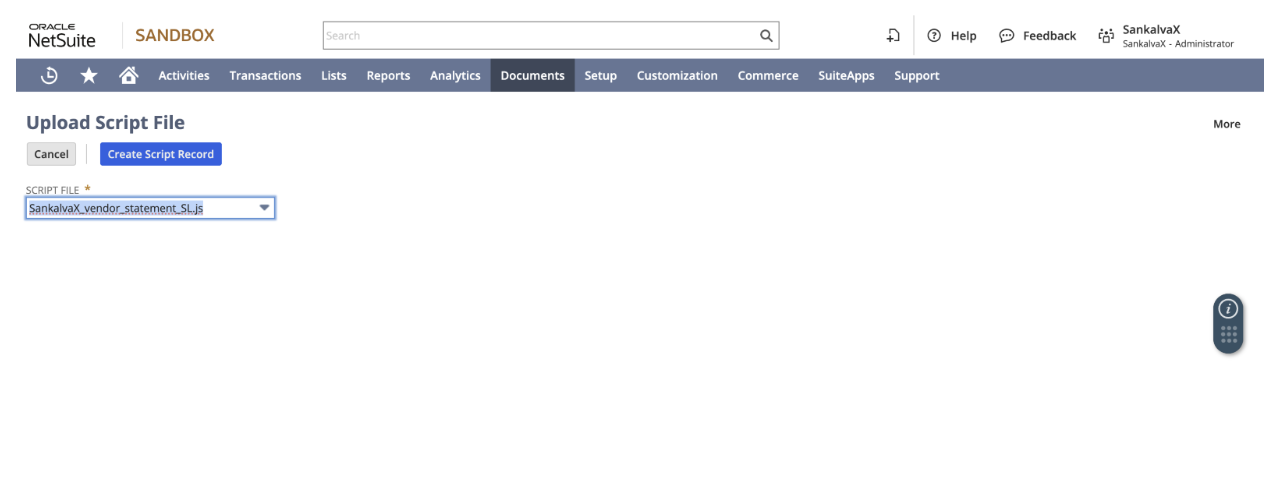
- Select the SankalvaX_vendor_statement_SL.js file from the list and click on Create Script Record.
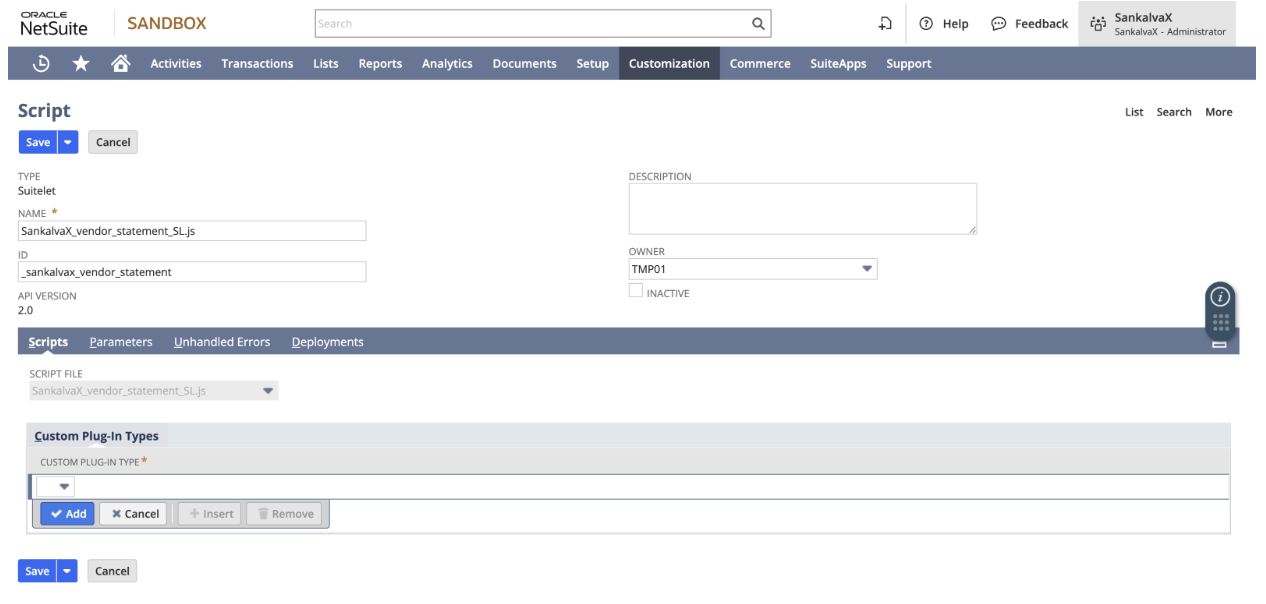
- Name and Save the Script -
- In the script record page, enter the following details:
- Name: SankalvaX_vendor_statement_SL.js
- ID: _sankalvax_vendor_statement
- Once added, click on Save.
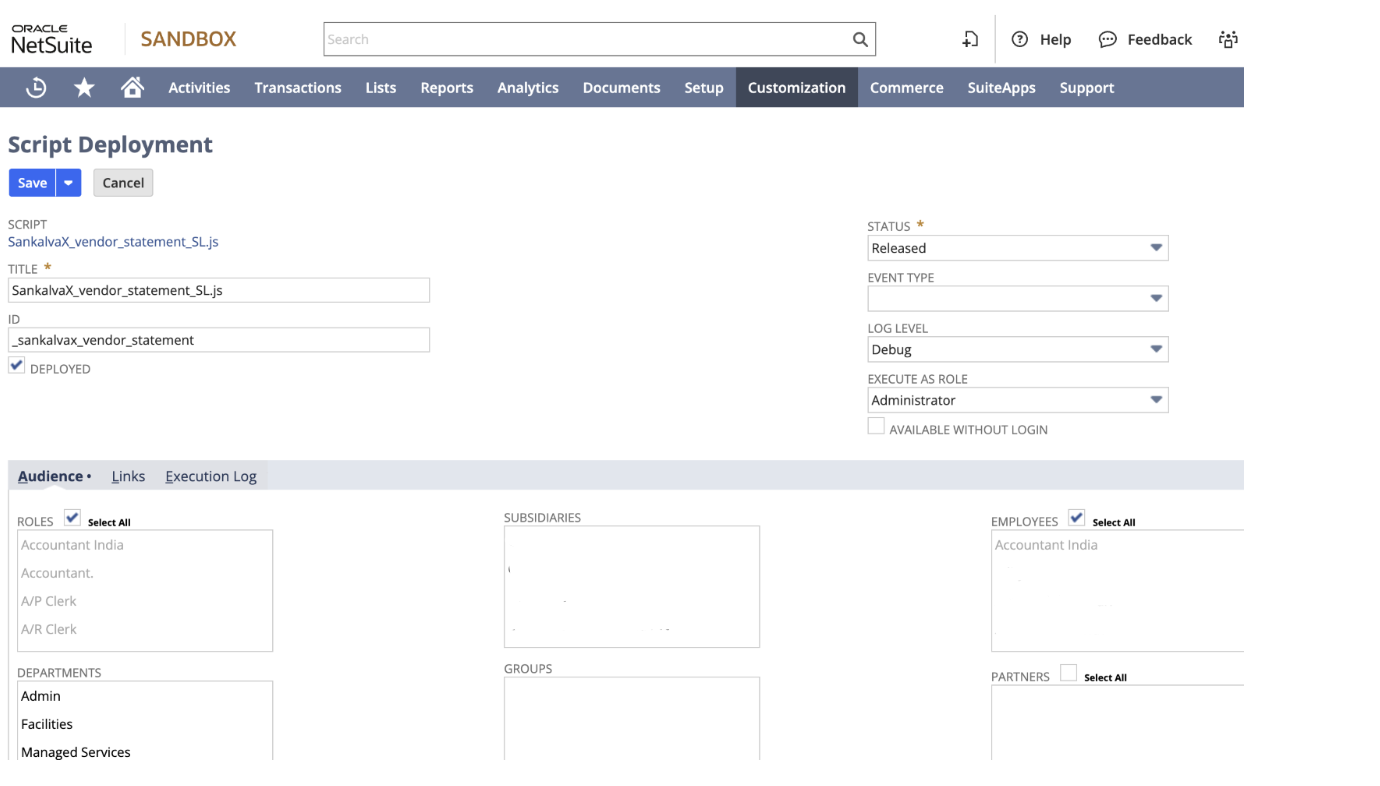
- Deploy the Script -
- After saving, the script will open up. Click on the Deploy Script button.
- Title: SankalvaX_vendor_statement_SL.js
- ID: _sankalvax_vendor_statement
- Check the checkbox and configure the other fields as shown in the screenshot below.
- Save the deployment.
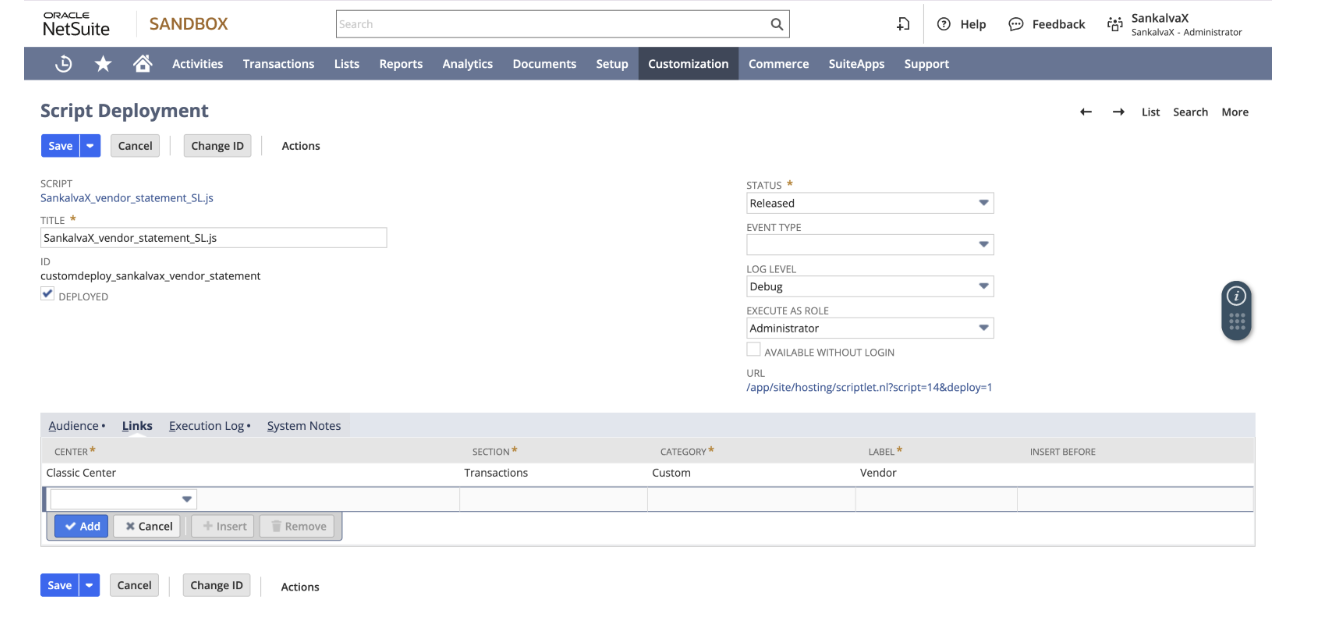
- After saving the deployment, navigate to the link provided below. In the screenshot, select the necessary values in the 'Link' subtab.
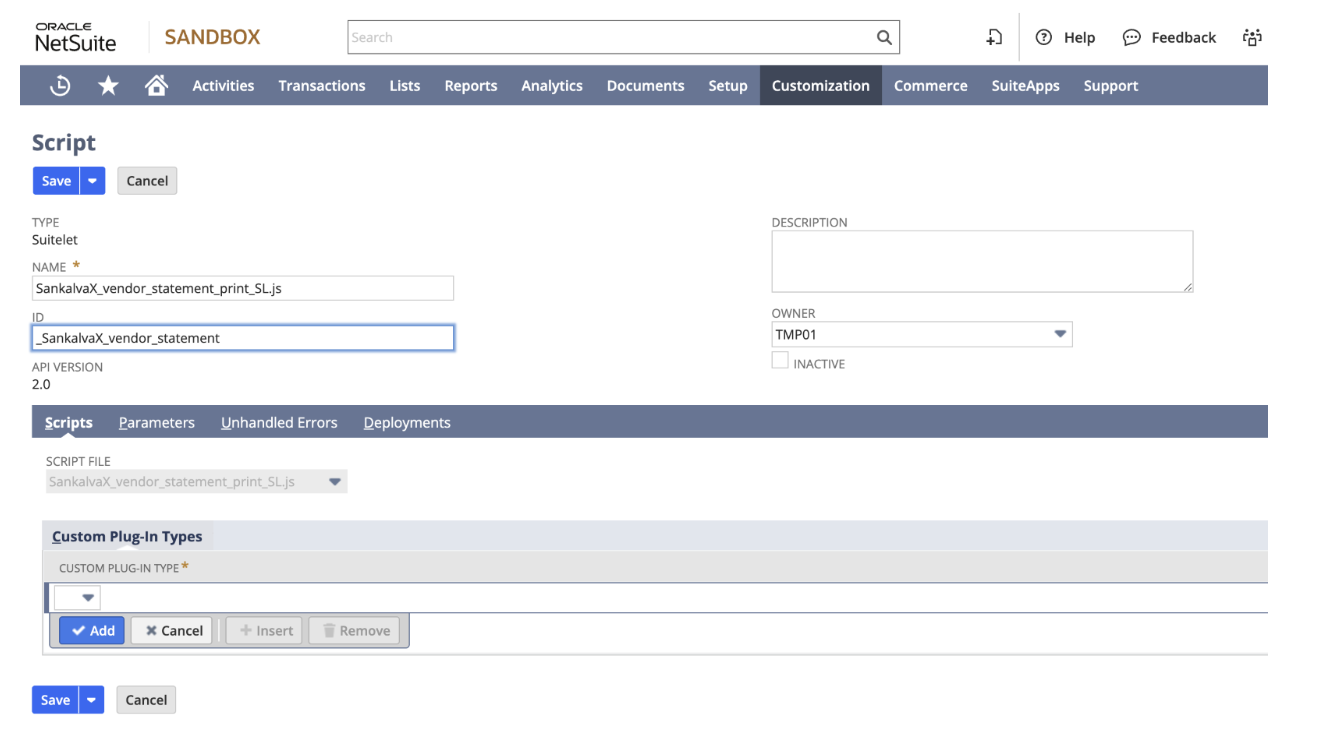
- Deploy the Second Script -
- Once the first script is deployed, you need to deploy the second one.
- Navigate again to: Customization > Scripting > Scripts > New.
- Select the SankalvaX_vendor_statement_print_SL.js file and click Create Script Record.

- Name and Save the Second Script -
- Name: SankalvaX_vendor_statement_print_SL.js
- ID: _sankalvax_vendor_print
- Once added, click on Save.
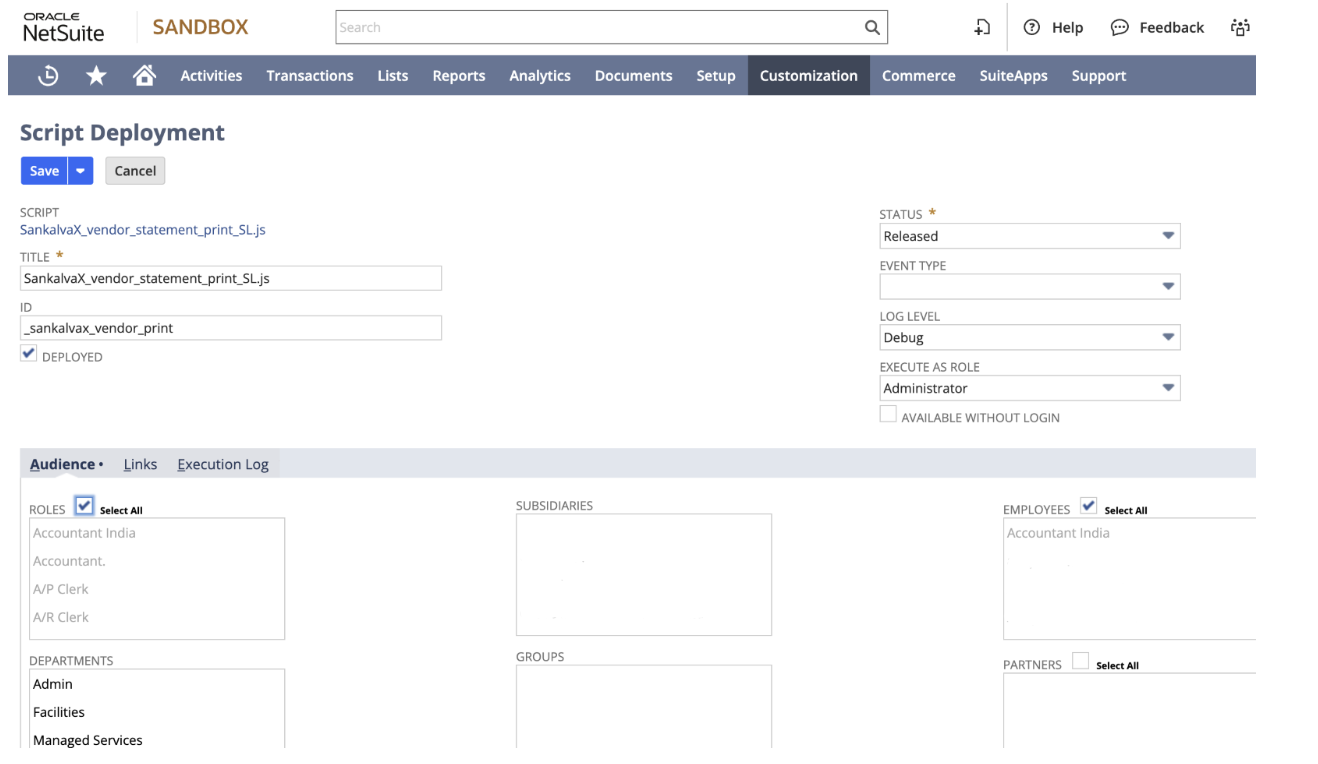
- Deploy the Second Script -
- After saving, click on the Deploy Script button for the second script.
- In the deployment page, enter:
- Title: SankalvaX_vendor_statement_print_SL.js
- ID: _sankalvax_vendor_print
- Check the checkbox and configure the other fields as shown in the screenshot below.
- Save the deployment.
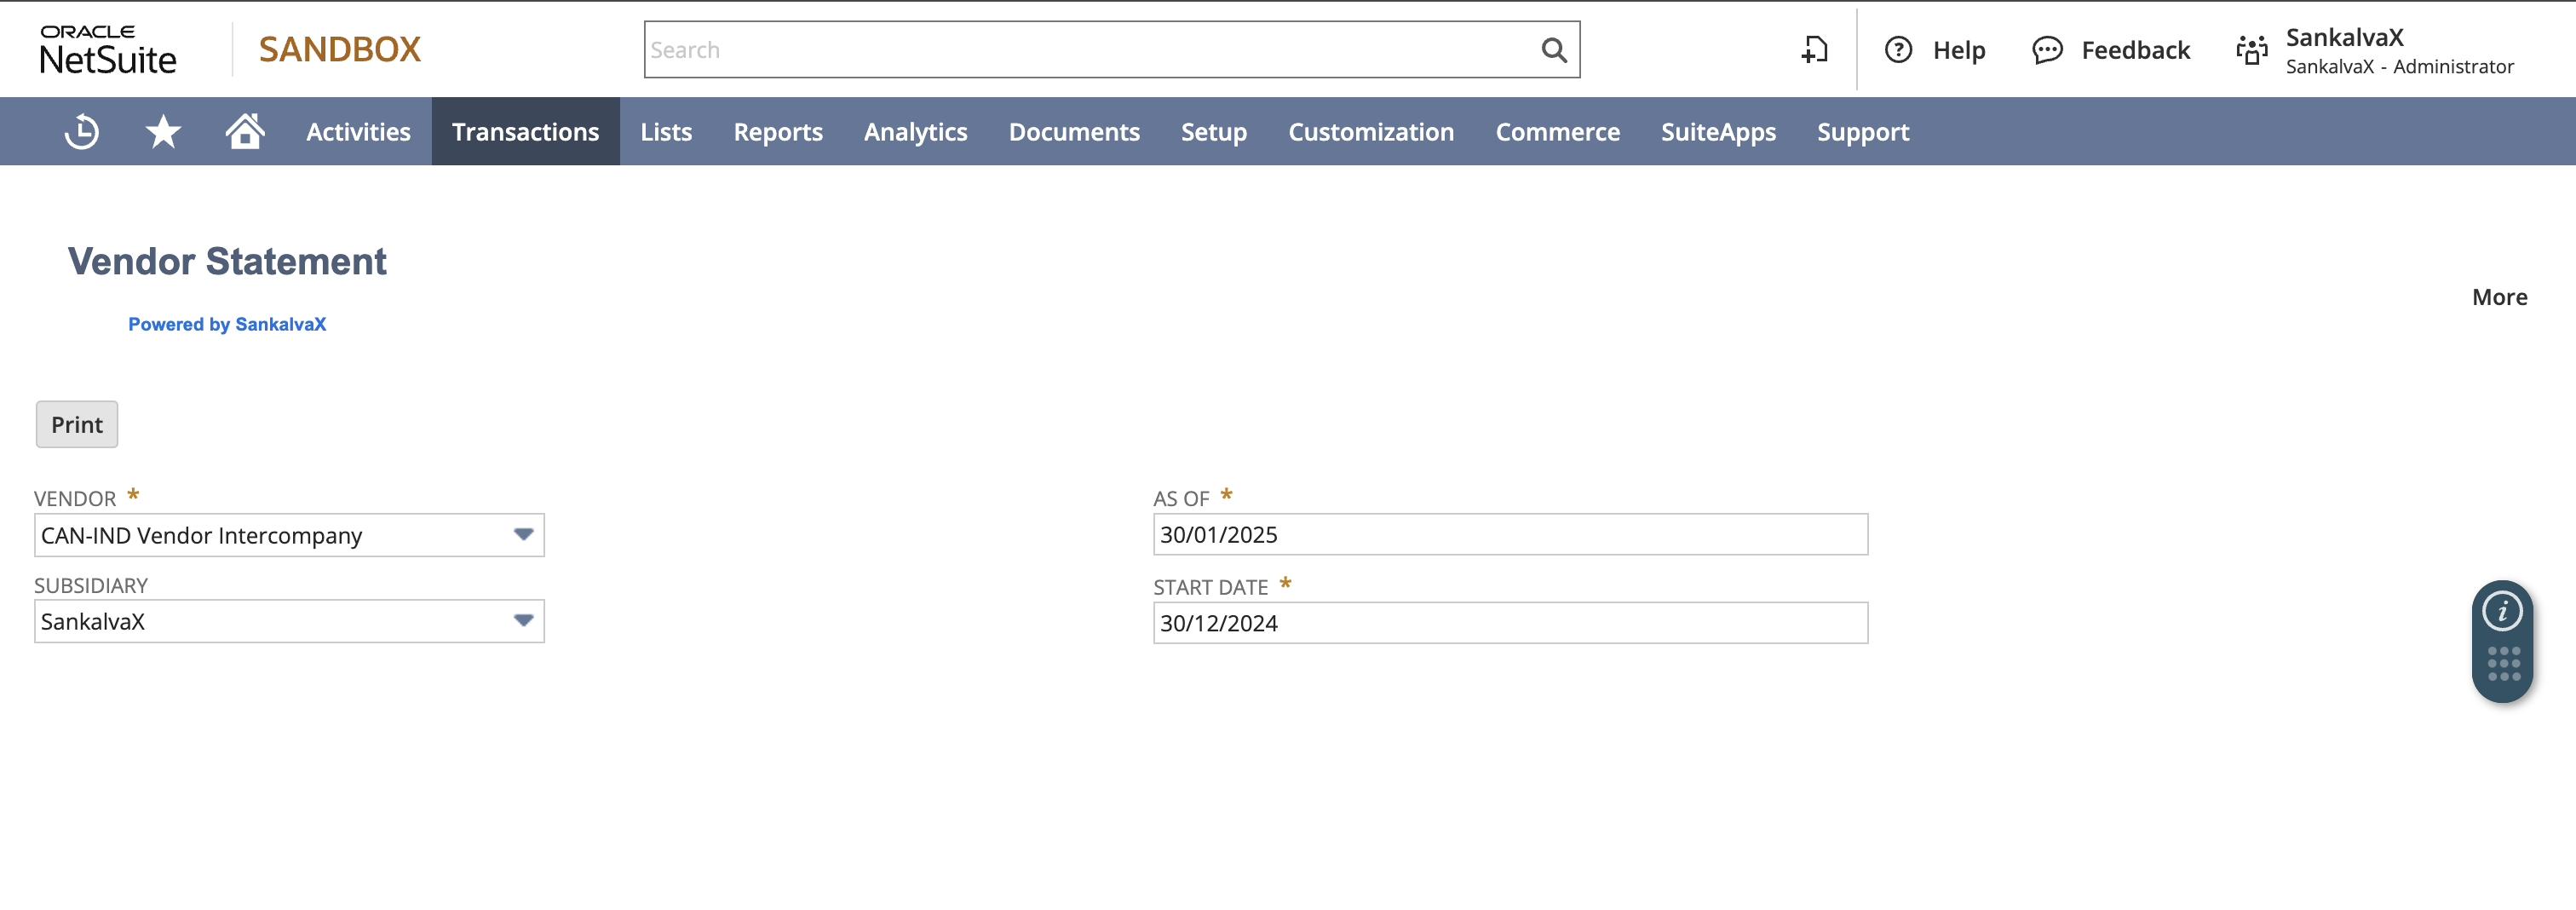
- Vendor Statement UI
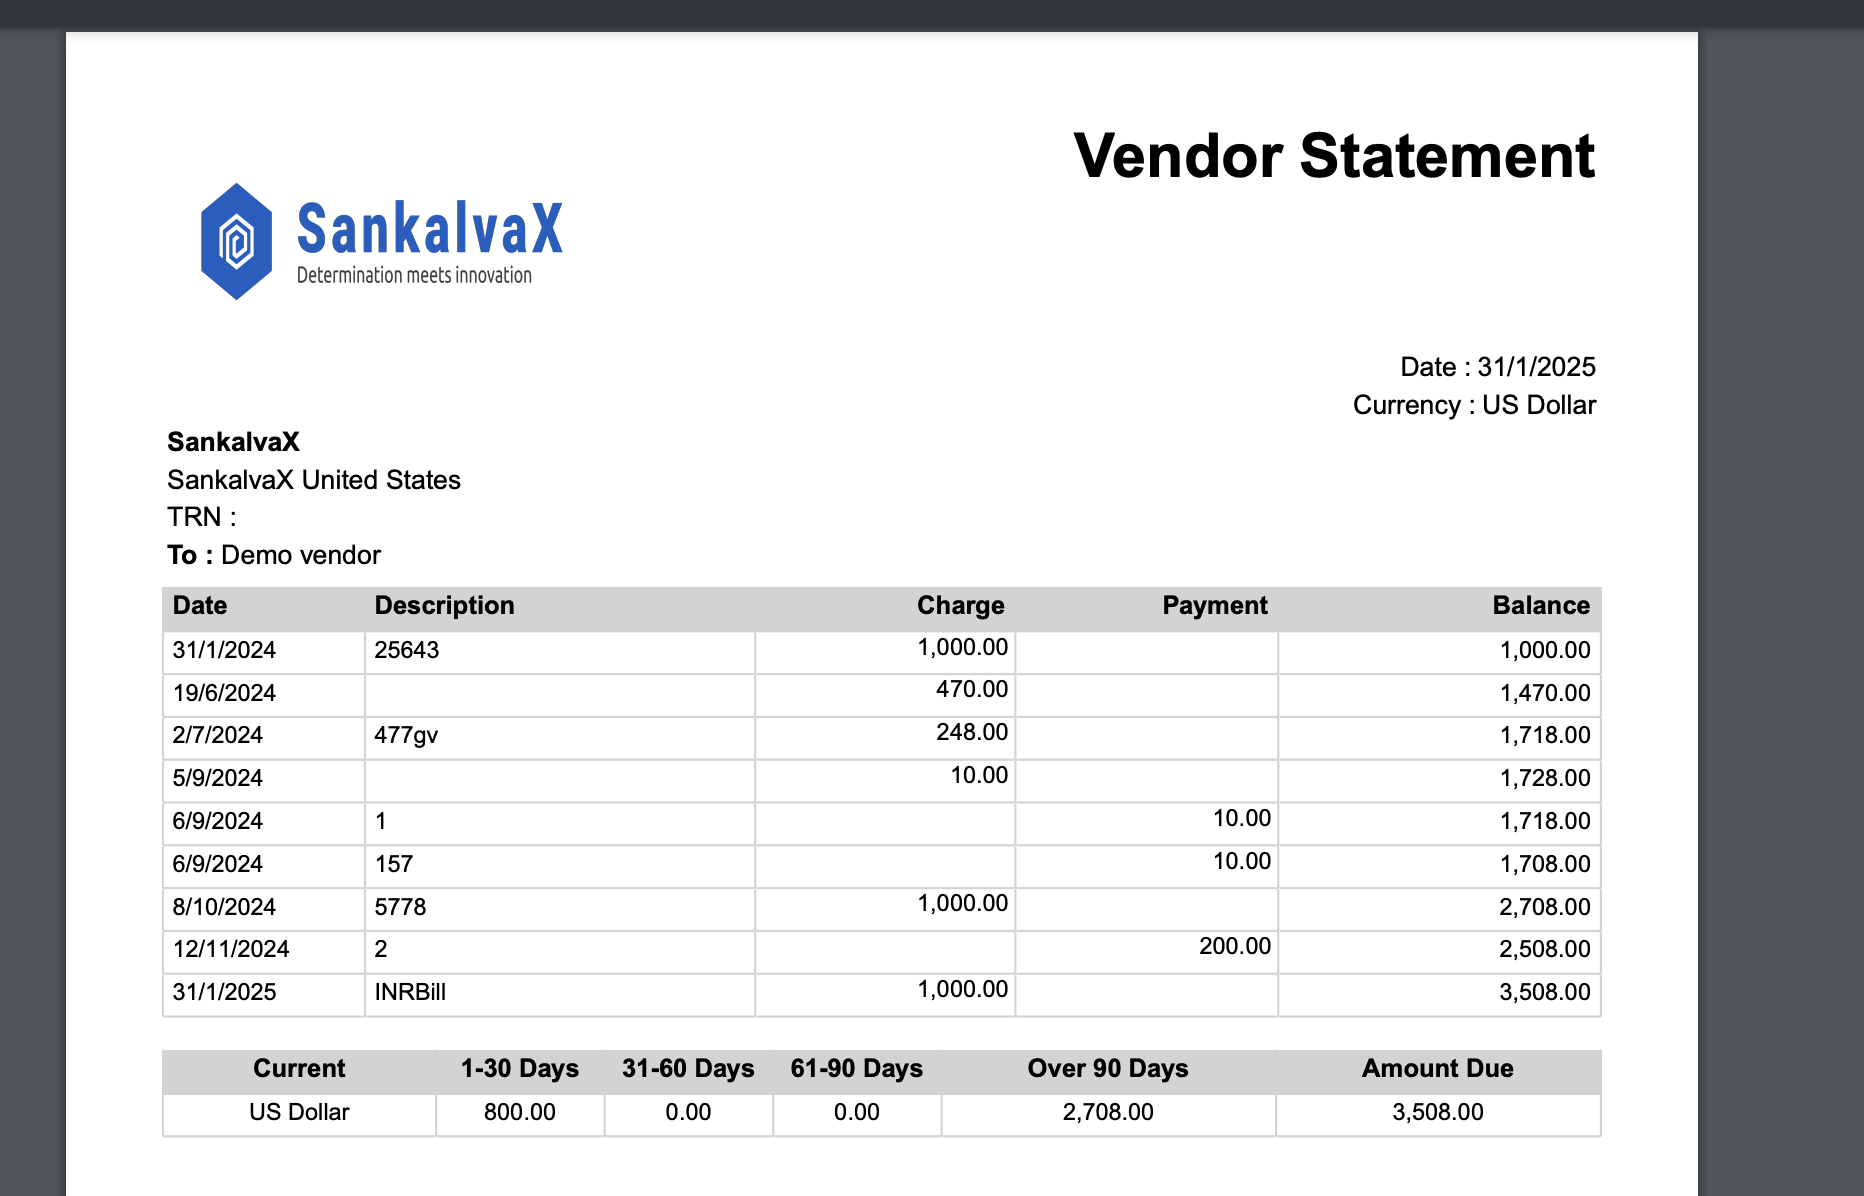
- Vendor Statement Print
- Once the process is complete, please forward it to the vendor and proceed with the Vendor Statement process.
Ready to Simplify Your Vendor Reconciliation Process?